Updated
SaaS-pocalypse is real!
When you run a business, you will need a set of software tools that make your life easier. Typically, you would use a SaaS product that gives you what you need, but never quite to the extent you need it. Probably you get 3 features that are important for a set fee, but a 4th feature you need costs you double or hasn’t been created yet.
That was the typical situation before AI. Not anymore 😌
Now you can create the tools you need, with the features you actually need and the user experience that fits you. In this blog, we’ll explore how you can create your own CRM application, showcasing a workflow that takes you from first prompt to production-ready product.
We will use:
- Lovable to create the interface of our CRM
- Cursor to create a full-stack Laravel app using the interface created by Lovable
- Diploi to host our entire app
This guide will give you a general blueprint that you could follow for replacing (almost) any SaaS tool you currently use.
Table of contents
- Workflow overview
- Step 2: Hosting and adding a working backend
- Step 3: setting up context files for Cursor and general advice to prompt safely
- Step 4: the migration workflow inside Cursor
- Step 5: Debugging the final app
- The economics of building over subscribing
- Conclusion: replacing any SaaS tools is possible, but be cautious
- References
Workflow overview
The workflow we’ll follow starts with the prompt to create the UI for our CRM on Lovable, then export it to Diploi for hosting, add Laravel, and finally use Cursor’s AI agent with context files to transform a prototype into production software.
Step 1: Prompting a CRM into existence with Lovable
Using Lovable, we’ll generate a prototype, and it will use React to create it. We’ll use the following prompt:
## **1) Product principles for a modern CRM (to guide design decisions)**
* **Fast to operate with one hand**: left nav + main canvas, minimal modals, keyboard shortcuts.
* **One global search** (contacts, leads, opportunities, quotes, orders, products).
* **Everything is an "entity page"** with a consistent layout: header + tabs + right-side activity timeline.
* **Activity-first**: reminders/notes are the same UI component across Leads, Opportunities, Quotations, Sales Orders.
* **Personal + team views**: users can create their own pipeline layouts while still working inside team pipelines.
---
## **2) Information architecture (screens)**
### **Primary modules**
1. **Dashboard**
2. **Leads** (list view, qualification, convert to opportunity)
3. **Pipeline** (kanban for opportunities)
4. **Contacts** (list + contact detail)
5. **Products** (list + product detail)
6. **Quotations** (list + quotation builder)
7. **Sales Orders** (list + order detail)
8. **Activities** (my reminders, overdue, due today, etc.)
9. **Settings** (teams, stages, fields, roles, templates)
---
## **3) App shell layout (global UI)**
### **Top bar (sticky)**
* **Left**: hamburger (collapse sidebar), logo/app name.
* **Center**: **Global Search** input
* Placeholder: "Search contacts, leads, opps, quotes…"
* Results grouped by entity type, with keyboard navigation.
* **Right**:
* "+ Create" button (dropdown): Lead, Opportunity, Contact, Quotation, Product, Activity
* Notification bell (optional)
* User avatar menu (profile, preferences, sign out)
### **Left sidebar (collapsible)**
* Dashboard
* Leads
* Pipeline
* Contacts
* Products
* Quotations
* Sales Orders
* Activities
* Settings (visible by role)
When collapsed: icons only, tooltips on hover.
### **Page structure (common)**
* **Page header row**:
* Title (e.g., "Pipeline")
* Context switchers (team, view, filters)
* Primary action button
* **Subheader**:
* Filter chips (Owner: Me, Team: Nordics, Stage: Qualified…)
* Saved views dropdown
* **Main content**:
* List/Kanban/Builder
* **Right panel** (optional on list pages, always on entity pages):
* Activity timeline and quick add note/reminder
---
## **4) Detailed layouts by feature**
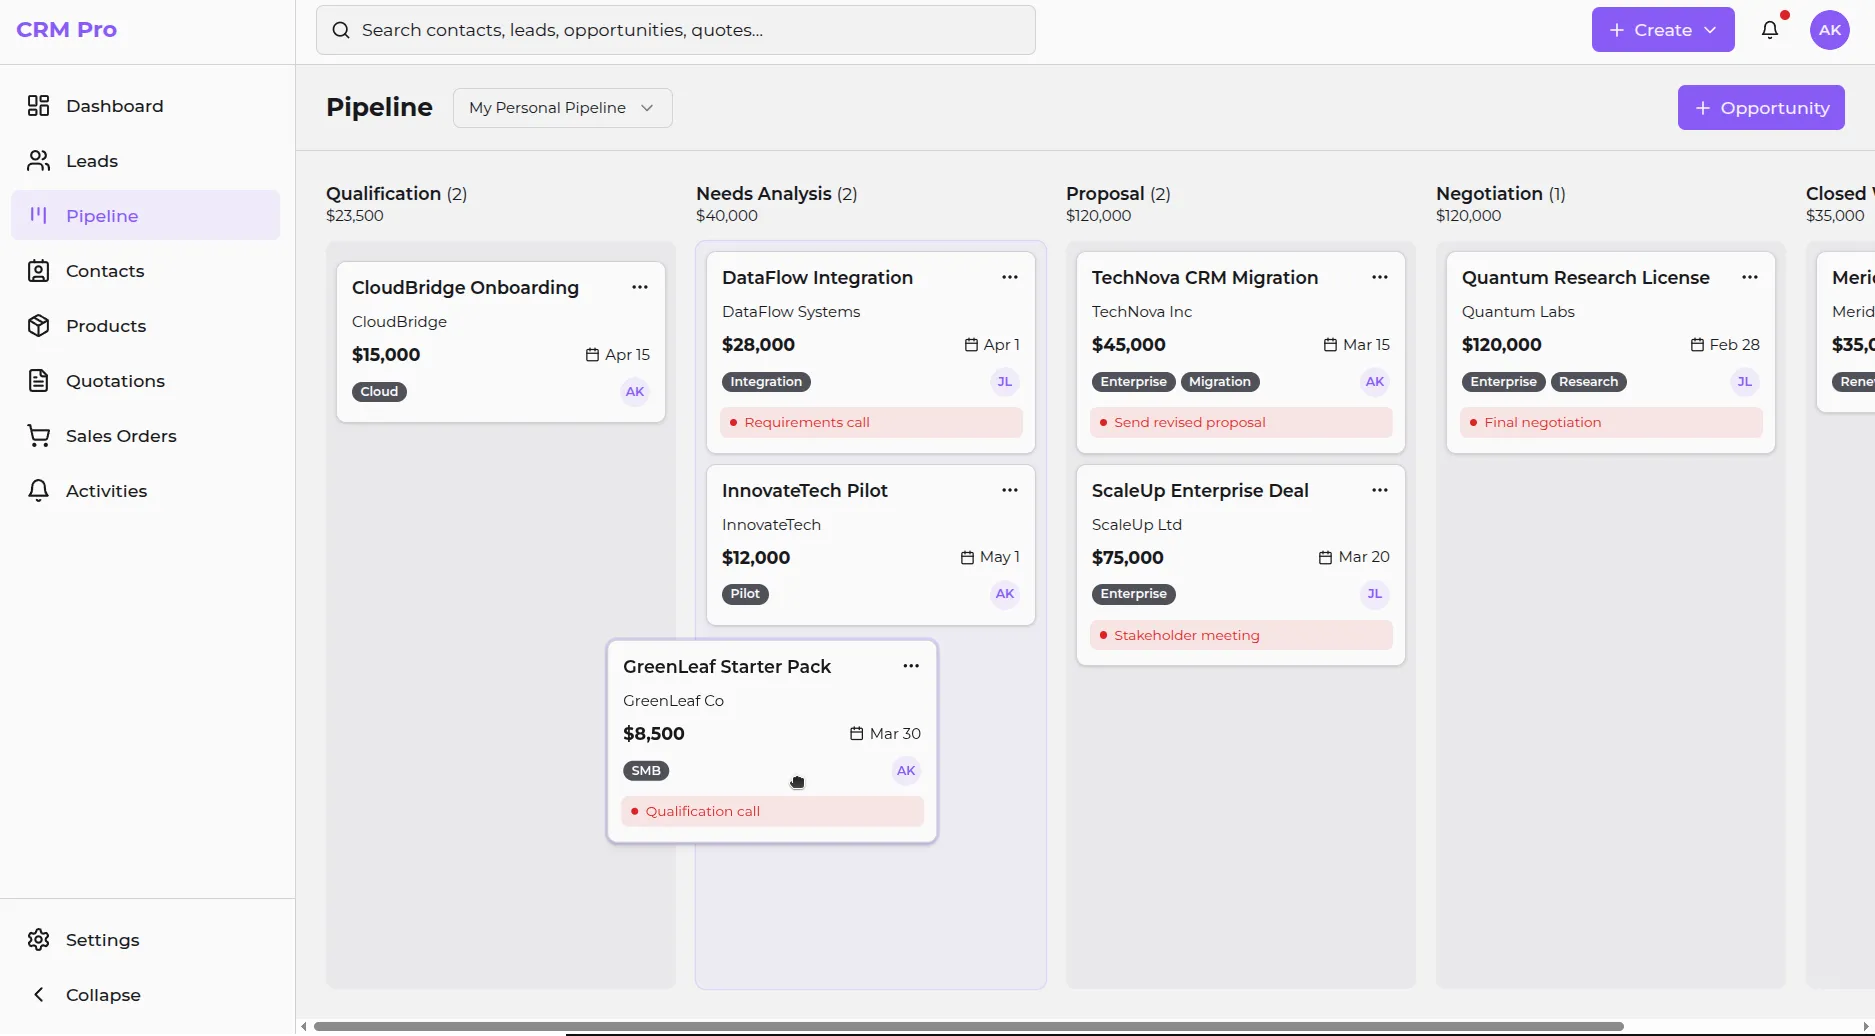
## **A) Sales pipeline (Opportunities Kanban)**
### **Pipeline page layout**
**Header controls**
* **Team selector** (dropdown): "My Personal Pipeline", plus "Team: X" pipelines available to user
* **View selector**: Kanban (default), List, Forecast (optional)
* **Saved views** dropdown (personal/team)
* **Filter bar**:
* Owner (Me / Any / specific user)
* Team
* Stage
* Expected close (date range)
* Tags
* Value range
* **Primary buttons**:
* "+ Opportunity"
* "Customize view" (personal) / "Customize team board" (if permission)
### **Kanban board design**
* Horizontal columns = stages.
* Each column has:
* Stage name + count
* Sum of amounts (optional)
* "…" menu (stage settings if allowed)
* Cards show (compact but informative):
* Opportunity name (bold)
* Company/Contact (secondary)
* Amount + currency
* Expected close date (pill)
* Priority indicator (optional)
* Owner avatar
* Next activity due (small icon + date; red if overdue)
* Tags (1-2 visible + "+n")
**Interactions**
* Drag & drop between stages (updates stage + stage change timestamp)
* Card click opens **Opportunity Drawer** (right-side sliding drawer) OR navigates to detail page (designer choice)
* Quick inline actions on hover:
* Add activity
* Add note
* Set close date
* Change owner
### **"Customize pipeline" (key requirement: each user has custom kanban + team kanbans)**
You'll support **board configurations**:
* **Personal board**: user chooses:
* Which stages appear
* Column order
* WIP limits (optional)
* Card fields shown (toggle: amount, close date, tags, company, next activity)
* Default filters (e.g., Owner=Me)
* **Team board**: similar, but applies to team pipeline and requires permission.
* Personal boards can be created **per team** too (e.g., "My view of Team A pipeline").
UX:
* A "Customize view" panel with:
* "Columns" (drag order, toggle visible)
* "Card fields" (checkboxes)
* "Defaults" (filters, sort)
* "Save as…" (Personal / Team if allowed)
---
## **B) Lead management (List view → move to pipeline)**
### **Leads page (list)**
**Header controls**
* Saved views dropdown (e.g., "New inbound", "My unqualified", "All leads")
* Filters: status, source, owner, team, created date, tag
* Buttons: "+ Lead", "Import" (optional)
**Table columns** (suggested)
* Lead name
* Company
* Email / phone
* Source
* Owner
* Status (New/Contacted/Qualified/Disqualified)
* Last activity
* Next activity
* Created
**Row actions**
* "Qualify" / "Convert to opportunity"
* "Schedule activity"
* "Disqualify"
* "Assign owner"
### **Lead detail page (very important)**
Two-column layout:
**Left main**
* Header: Lead name + status pill + owner + team
* Quick actions: Convert, Disqualify, Create quotation (optional)
* Tabs:
1. Overview (default)
2. Notes & Activity (or this can be on right timeline)
3. Related (contacts, opportunities created from lead)
4. Audit (optional)
**Overview section blocks**
* Contact info (name, company, email, phone)
* Lead details (source, tags, estimated value, interest/product)
* Qualification checklist (optional)
* Custom fields section (configurable)
**Right side panel**
* **Activity timeline** (notes + reminders + system events)
* "Add note" input (supports @mentions optional)
* "Add reminder" quick form:
* Type: Call / Email / Follow-up / Meeting / Task
* Due date/time
* Assign to (default owner)
* Linked entity auto set to current lead
### **Convert lead → opportunity flow**
A light modal or drawer:
* Opportunity name (default from lead)
* Link/create contact + company
* Choose pipeline/team + initial stage
* Expected amount + close date
* Owner
* Option: mark lead as converted + keep reference
After convert:
* User lands in opportunity detail (or pipeline with highlight)
---
## **C) Contacts list + contact detail**
### **Contacts list page**
* Table with:
* Name
* Company (if person)
* Type (Person/Company)
* Email
* Phone
* Owner
* Tags
* Last activity / Next activity
* Row click opens Contact detail.
### **Contact detail page**
Two-column layout like others.
**Header**
* Name + type badge
* Primary actions: New opportunity, New quotation, Add activity
* Secondary: Merge (admin), Export (optional)
**Left main tabs**
* Overview: contact fields, addresses, VAT/ID (optional), owner/team
* Opportunities: list of related opportunities
* Quotations / Orders: related docs
* Products (optional "interests" or purchased items)
**Right panel**
* Activity timeline + add note/reminder
---
## **D) Products list + product detail**
### **Products list page**
* Table columns:
* SKU
* Name
* Sales price
* Cost (restricted by role)
* Active
* Category
* Actions: New product (permission)
### **Product detail page**
* Header: product name + SKU
* Tabs: Overview, Pricing, Metadata
* Keep it simple unless you're building inventory later.
---
## **E) Quotation builder (Odoo-like rows)**
### **Quotations list page**
* Table:
* Quote number
* Customer
* Opportunity (optional link)
* Status (Draft/Sent/Accepted/Rejected/Expired)
* Total
* Created / Valid until
* Owner
* Actions: New quotation
### **Quotation detail (builder) page layout**
This is the most "app-like" page; minimize scrolling.
**Top header**
* Quote number + status pill
* Customer (searchable dropdown)
* Linked opportunity (optional)
* Valid until date
* Currency
* Owner/team
* Buttons:
* Save
* Send (changes status to Sent)
* Mark accepted (→ optionally create Sales Order)
* PDF preview (optional)
**Main canvas split**
* **Left (70%)**: line items grid
* **Right (30%)**: totals + settings + activity
#### **Line items grid (Odoo-like)**
Row columns:
* Drag handle (reorder)
* Product (searchable)
* Description (editable textarea-like)
* Qty
* Unit
* Unit price
* Discount %
* Tax % (optional)
* Line total
* Trash icon
Features:
* "Add line" button
* Inline product search (typeahead)
* Keyboard friendly: Enter to next cell, Cmd/Ctrl+Enter add row
* Optional row types:
* Section header row
* Note row
(If you want Odoo parity, keep these—they're extremely useful.)
#### **Totals card (right)**
* Subtotal
* Discount total (optional)
* Tax total (optional)
* Total
* "Optional: deposit / payment terms" (later)
* "Internal note" (for sales team)
**Right panel below totals**
* Activity timeline + add note/reminder
### **Create Sales Order from quotation**
* "Confirm" / "Mark accepted" creates Sales Order snapshot of quote lines.
* Sales Order becomes locked-ish (editable by role).
---
## **F) Sales orders**
### **Sales Orders list**
* Order number
* Customer
* Status (Draft/Confirmed/Delivered/Invoiced/Cancelled — or simpler)
* Total
* Linked quotation
* Owner
* Dates
### **Sales Order detail**
* Similar to quotation, but fewer editable controls.
* Tabs: Overview, Lines, Activity, Documents (optional)
---
## **G) Reminders/notes (unified Activity system)**
You want reminders/notes for Leads, Opportunities, Quotations, Sales Orders.
### **Activity types**
* **Note** (free text)
* **Reminder/Task** (due date/time, status open/done, assigned user)
* Optional: Call, Email, Meeting as "task categories"
### **UI component (consistent)**
In the right panel:
* Quick add "Note"
* Quick add "Reminder"
* Timeline list:
* Overdue reminders at top (red)
* Upcoming reminders
* Notes
* System events (stage changed, status changed, amount updated)
On list pages:
* Show "Next activity" column, clickable to open quick complete/reschedule.
---
## **5) Roles (simple but enough)**
Keep roles small, add permissions gradually.
1. **Admin**
* Full access, settings, roles, delete records, manage pipelines/stages, manage teams.
2. **Sales Manager**
* Manage team pipelines/boards, reassign owners, view all team records, approve discounts (optional), see revenue reports.
3. **Sales Rep**
* Work on own leads/opportunities/quotes/orders, create/edit within permitted scope, personal views.
4. **Read-only / Finance**
* Read access to contacts, quotes, orders; can export; can mark orders invoiced (if you need).
5. **Support (optional)**
* Can view customers and notes, add activities, but cannot change pipeline financial fields.
Implementation-wise: role-based permissions + record-level rules:
* Reps can see their own + team's depending on settings.
* Managers can see all in their teams.
* Admin sees all.
Each section of this prompt has a function and it will help you write prompts like this for any app you want to build, not just a CRM.
Anatomy of the prompt
When vibe-coding, you must think of your initial prompt as both an instruction and a blueprint with layers.
The instruction part of your prompt is the easy part, which basically tells the AI what you want to get done.
The blueprint part of your prompt tells the AI how you want it done. Any details skipped when you define your blueprint will be either made up by the AI or skipped entirely.
In general, a prompt to generate a business application should have the following layers:
- Product principles, which define how the app should feel.
- Information architecture, defines what pages/modules must exist.
- App layout, defines the general UI of everything.
- Feature layouts, specifies how users interact and view each feature.
- User roles, which determines the types of users and what they can or cannot do.
1. Product principles
## **1) Product principles for a modern CRM (to guide design decisions)**

* **Fast to operate with one hand**: left nav + main canvas, minimal modals, keyboard shortcuts.

* **One global search** (contacts, leads, opportunities, quotes, orders, products).

* **Everything is an "entity page"** with a consistent layout: header + tabs + right-side activity timeline.

* **Activity-first**: reminders/notes are the same UI component across Leads, Opportunities, Quotations, Sales Orders.

* **Personal + team views**: users can create their own pipeline layouts while still working inside team pipelines.
The prompt opens with 5 design values: fast one-hand operation, global search, consistent entity pages, activity-first design, and personal + team views.
Without these, AI builders make arbitrary UX decisions. Each principle constrains hundreds of micro-choices, “fast to operate with one hand” tells the AI to prefer inline actions over modals, sidebars over popups, and keyboard shortcuts over mouse-only flows.
Adapt it: Write 3-5 principles about how your app feels to use, not what it does. For a project management tool, for example, might say “everything is a timeline” and “drag-and-drop is the primary interaction.”
2. Information architecture:
## **2) Information architecture (screens)**

### **Primary modules**

1. **Dashboard**

2. **Leads** (list view, qualification, convert to opportunity)

3. **Pipeline** (kanban for opportunities)

4. **Contacts** (list + contact detail)

5. **Products** (list + product detail)

6. **Quotations** (list + quotation builder)

7. **Sales Orders** (list + order detail)

8. **Activities** (my reminders, overdue, due today, etc.)

9. **Settings** (teams, stages, fields, roles, templates)
A flat list of 9 modules (Dashboard, Leads, Pipeline, Contacts, Products, Quotations, Sales Orders, Activities, Settings) acting as the app’s sitemap. This determines the navigation structure, routing, and how many page components get generated, so you don’t need to spend credits on features your app won’t need.
Adapt it: Include a behavior hint after each module name, like “list view, qualification, convert to opportunity” for Leads. These hints tell the AI which UI pattern to use (table, kanban, builder, form, etc).
3. App layout:
## **3) App shell layout (global UI)**

### **Top bar (sticky)**

* **Left**: hamburger (collapse sidebar), logo/app name.

* **Center**: **Global Search** input

* Placeholder: "Search contacts, leads, opps, quotes…"

* Results grouped by entity type, with keyboard navigation.

* **Right**:

* "+ Create" button (dropdown): Lead, Opportunity, Contact, Quotation, Product, Activity

* Notification bell (optional)

* User avatar menu (profile, preferences, sign out)

### **Left sidebar (collapsible)**

* Dashboard

* Leads

* Pipeline

* Contacts

* Products

* Quotations

* Sales Orders

* Activities

* Settings (visible by role)

When collapsed: icons only, tooltips on hover.

### **Page structure (common)**

* **Page header row**:

* Title (e.g., "Pipeline")

* Context switchers (team, view, filters)

* Primary action button

* **Subheader**:

* Filter chips (Owner: Me, Team: Nordics, Stage: Qualified…)

* Saved views dropdown

* **Main content**:

* List/Kanban/Builder

* **Right panel** (optional on list pages, always on entity pages):

* Activity timeline and quick add note/reminder
This describes the UI for the app and available actions for each page. This is important because every page inherits this structure, so getting it right means every page stays consistent. Although, as with anything AI, it is not perfect and you still need to make sure it is actually consistent.
Adapt it: We recommend that you define three core details for your application using this section: (1) what’s always visible (top bar, sidebar), (2) what varies per page (the content area), and (3) what interaction patterns repeat (filters, saved views, right panel settings).
4. Detailed layouts by feature:
## **4) Detailed layouts by feature**

## **A) Sales pipeline (Opportunities Kanban)**

### **Pipeline page layout**

**Header controls**

* **Team selector** (dropdown): "My Personal Pipeline", plus "Team: X" pipelines available to user

* **View selector**: Kanban (default), List, Forecast (optional)

* **Saved views** dropdown (personal/team)

* **Filter bar**:

* Owner (Me / Any / specific user)

* Team

* Stage

* Expected close (date range)

* Tags

* Value range

* **Primary buttons**:

* "+ Opportunity"

* "Customize view" (personal) / "Customize team board" (if permission)

### **Kanban board design**

* Horizontal columns = stages.

* Each column has:

* Stage name + count

* Sum of amounts (optional)

* "…" menu (stage settings if allowed)

* Cards show (compact but informative):

* Opportunity name (bold)

* Company/Contact (secondary)

* Amount + currency

* Expected close date (pill)

* Priority indicator (optional)

* Owner avatar

* Next activity due (small icon + date; red if overdue)

* Tags (1-2 visible + "+n")

**Interactions**

* Drag & drop between stages (updates stage + stage change timestamp)

* Card click opens **Opportunity Drawer** (right-side sliding drawer) OR navigates to detail page (designer choice)

* Quick inline actions on hover:

* Add activity

* Add note

* Set close date

* Change owner

### **"Customize pipeline" (key requirement: each user has custom kanban + team kanbans)**

You'll support **board configurations**:

* **Personal board**: user chooses:

* Which stages appear

* Column order

* WIP limits (optional)

* Card fields shown (toggle: amount, close date, tags, company, next activity)

* Default filters (e.g., Owner=Me)

* **Team board**: similar, but applies to team pipeline and requires permission.

* Personal boards can be created **per team** too (e.g., "My view of Team A pipeline").

UX:

* A "Customize view" panel with:

* "Columns" (drag order, toggle visible)

* "Card fields" (checkboxes)

* "Defaults" (filters, sort)

* "Save as…" (Personal / Team if allowed)

---

## **B) Lead management (List view → move to pipeline)**

### **Leads page (list)**

**Header controls**

* Saved views dropdown (e.g., "New inbound", "My unqualified", "All leads")

* Filters: status, source, owner, team, created date, tag

* Buttons: "+ Lead", "Import" (optional)

**Table columns** (suggested)

* Lead name

* Company

* Email / phone

* Source

* Owner

* Status (New/Contacted/Qualified/Disqualified)

* Last activity

* Next activity

* Created

**Row actions**

* "Qualify" / "Convert to opportunity"

* "Schedule activity"

* "Disqualify"

* "Assign owner"

### **Lead detail page (very important)**

Two-column layout:

**Left main**

* Header: Lead name + status pill + owner + team

* Quick actions: Convert, Disqualify, Create quotation (optional)

* Tabs:

1. Overview (default)

2. Notes & Activity (or this can be on right timeline)

3. Related (contacts, opportunities created from lead)

4. Audit (optional)

**Overview section blocks**

* Contact info (name, company, email, phone)

* Lead details (source, tags, estimated value, interest/product)

* Qualification checklist (optional)

* Custom fields section (configurable)

**Right side panel**

* **Activity timeline** (notes + reminders + system events)

* "Add note" input (supports @mentions optional)

* "Add reminder" quick form:

* Type: Call / Email / Follow-up / Meeting / Task

* Due date/time

* Assign to (default owner)

* Linked entity auto set to current lead

### **Convert lead → opportunity flow**

A light modal or drawer:

* Opportunity name (default from lead)

* Link/create contact + company

* Choose pipeline/team + initial stage

* Expected amount + close date

* Owner

* Option: mark lead as converted + keep reference

After convert:

* User lands in opportunity detail (or pipeline with highlight)

---

## **C) Contacts list + contact detail**

### **Contacts list page**

* Table with:

* Name

* Company (if person)

* Type (Person/Company)

* Email

* Phone

* Owner

* Tags

* Last activity / Next activity

* Row click opens Contact detail.

### **Contact detail page**

Two-column layout like others.

**Header**

* Name + type badge

* Primary actions: New opportunity, New quotation, Add activity

* Secondary: Merge (admin), Export (optional)

**Left main tabs**

* Overview: contact fields, addresses, VAT/ID (optional), owner/team

* Opportunities: list of related opportunities

* Quotations / Orders: related docs

* Products (optional "interests" or purchased items)

**Right panel**

* Activity timeline + add note/reminder

---

## **D) Products list + product detail**

### **Products list page**

* Table columns:

* SKU

* Name

* Sales price

* Cost (restricted by role)

* Active

* Category

* Actions: New product (permission)

### **Product detail page**

* Header: product name + SKU

* Tabs: Overview, Pricing, Metadata

* Keep it simple unless you're building inventory later.

---

## **E) Quotation builder (Odoo-like rows)**

### **Quotations list page**

* Table:

* Quote number

* Customer

* Opportunity (optional link)

* Status (Draft/Sent/Accepted/Rejected/Expired)

* Total

* Created / Valid until

* Owner

* Actions: New quotation

### **Quotation detail (builder) page layout**

This is the most "app-like" page; minimize scrolling.

**Top header**

* Quote number + status pill

* Customer (searchable dropdown)

* Linked opportunity (optional)

* Valid until date

* Currency

* Owner/team

* Buttons:

* Save

* Send (changes status to Sent)

* Mark accepted (→ optionally create Sales Order)

* PDF preview (optional)

**Main canvas split**

* **Left (70%)**: line items grid

* **Right (30%)**: totals + settings + activity

#### **Line items grid (Odoo-like)**

Row columns:

* Drag handle (reorder)

* Product (searchable)

* Description (editable textarea-like)

* Qty

* Unit

* Unit price

* Discount %

* Tax % (optional)

* Line total

* Trash icon

Features:

* "Add line" button

* Inline product search (typeahead)

* Keyboard friendly: Enter to next cell, Cmd/Ctrl+Enter add row

* Optional row types:

* Section header row

* Note row
  (If you want Odoo parity, keep these—they're extremely useful.)

#### **Totals card (right)**

* Subtotal

* Discount total (optional)

* Tax total (optional)

* Total

* "Optional: deposit / payment terms" (later)

* "Internal note" (for sales team)

**Right panel below totals**

* Activity timeline + add note/reminder

### **Create Sales Order from quotation**

* "Confirm" / "Mark accepted" creates Sales Order snapshot of quote lines.

* Sales Order becomes locked-ish (editable by role).

---

## **F) Sales orders**

### **Sales Orders list**

* Order number

* Customer

* Status (Draft/Confirmed/Delivered/Invoiced/Cancelled — or simpler)

* Total

* Linked quotation

* Owner

* Dates

### **Sales Order detail**

* Similar to quotation, but fewer editable controls.

* Tabs: Overview, Lines, Activity, Documents (optional)

---

## **G) Reminders/notes (unified Activity system)**

You want reminders/notes for Leads, Opportunities, Quotations, Sales Orders.

### **Activity types**

* **Note** (free text)

* **Reminder/Task** (due date/time, status open/done, assigned user)

* Optional: Call, Email, Meeting as "task categories"

### **UI component (consistent)**

In the right panel:

* Quick add "Note"

* Quick add "Reminder"

* Timeline list:

* Overdue reminders at top (red)

* Upcoming reminders

* Notes

* System events (stage changed, status changed, amount updated)

On list pages:

* Show "Next activity" column, clickable to open quick complete/reschedule.
This is the longest section for the prompt, and includes detailed specs for the different views of the app. For the case of our CRM, we define:
- Pipeline kanban with drag-and-drop and card field priorities
- Lead management with a conversion flow
- Quotation builder with Odoo-like line items and inline product search
- Unified activity/reminder system
- Lists and detail page layouts, for products, contacts and other views that display data using tables
Adapt it: Prioritize describing interactions (drag, inline edit, typeahead search), because interactions are where AI tools tend to make the worst assumptions. For features that could be considered as “typical”, like a contact form, you don’t need detailed specs, which will help you create prompts that are more precise and consume less tokens.
5. Defining user Roles:
## **5) Roles (simple but enough)**

Keep roles small, add permissions gradually.

1. **Admin**

 * Full access, settings, roles, delete records, manage pipelines/stages, manage teams.

2. **Sales Manager**

 * Manage team pipelines/boards, reassign owners, view all team records, approve discounts (optional), see revenue reports.

3. **Sales Rep**

 * Work on own leads/opportunities/quotes/orders, create/edit within permitted scope, personal views.

4. **Read-only / Finance**

 * Read access to contacts, quotes, orders; can export; can mark orders invoiced (if you need).

5. **Support (optional)**

 * Can view customers and notes, add activities, but cannot change pipeline financial fields.

Implementation-wise: role-based permissions + record-level rules:

* Reps can see their own + team's depending on settings.

* Managers can see all in their teams.

* Admin sees all.
We set five different user roles:
- Admin
- Sales Manager
- Sales Rep
- Read-only/Finance
- Support
Each with their set of permissions and UI modifiers, so the user experience would have a dynamic feel, based on the role of each user. If you have a single type of user, you should still define it here, because if it’s skipped, the AI might either generate a default user experience for all users or create user categories and boundaries that it assumes are typical for the type of app being generated, which would be out of our control.
Adapt it: Define roles even if there’s only one user. It helps shape the db schema, data models, and access patterns you’ll need when adding a real backend later.
With these five sections, the prompt gives Lovable enough structure to generate a complete and opinionated frontend rather than a generic template. Here’s what it produced:

We got a working navigation, responsive layouts, and interconnected views. The generated code uses React+Vite and has the following project structure:
src/
├── components/
│ └── layout/ # Core app layout
│ └── shared/ # Components used across multiple views/pages
│ └── ui/ # shadcn/ui primitives (Button, Card, Dialog, Table...)
├── pages/ # Route components (Dashboard, Leads, Pipeline...)
├── hooks/ # Custom React hooks
├── lib/ # Utility functions and data mocks
├── App.tsx # Main app with React Router
└── main.tsx # Entry point
At this point, we have only the frontend code, but the data layer is missing. So the next stage is to transform our application into a fullstack solution with Laravel.
Step 2: Hosting and adding a working backend
We will move the prototype we built on Lovable to Diploi (yes, that’s us 😊), where you can both develop using cloud development environments and host apps without configuring servers. Of course, you could host on any other platform you prefer or use other vibe coding tools to proceed from this point onwards.
In this guide, we are using Diploi because we want to promote our solution and we believe it would help you skip all configuration work required to launch an application online. Alternatively, you could avoid deploying online while we add a backend, and just clone your project on your local machine using git clone your-repo to continue developing, and only host it when you are ready.
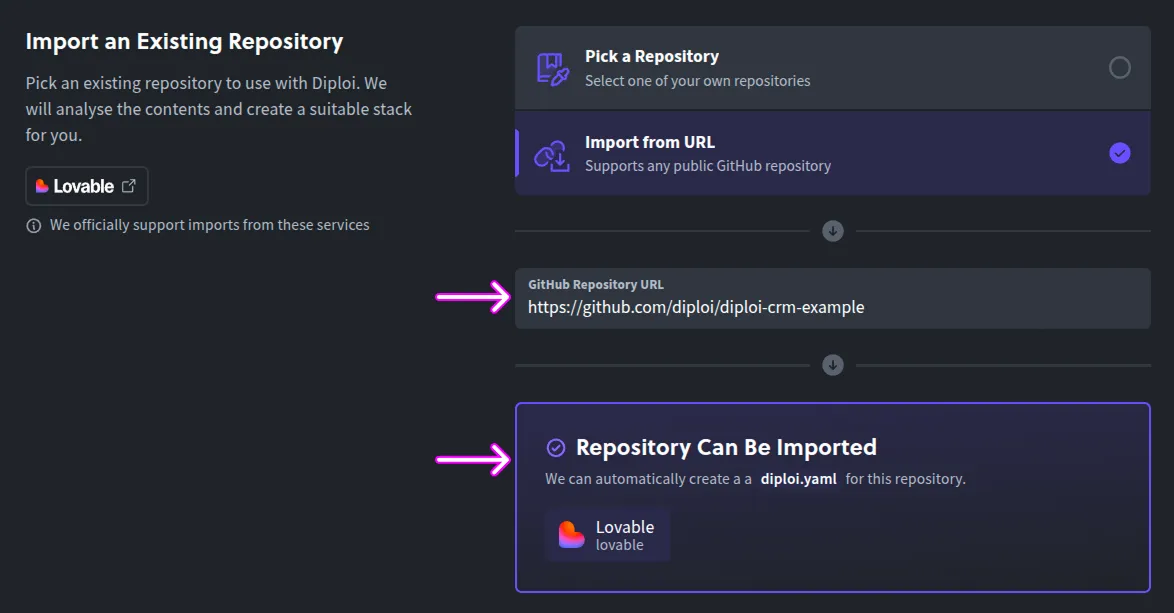
Exporting from Lovable to Diploi
You can bring any application built with Lovable to Diploi by using GitHub and selecting the repository where you stored your app. You can start the import wizard by visiting https://diploi.com/lovable or signing up on Diploi and creating a new project.
If you use Diploi, you don’t need to worry about dependencies since we create a remote development environment, to which you can connect using Cursor via SSH.
Unlike platforms that only handle deployment (Vercel, Railway) or only handle development (Codespaces), Diploi handles both.
Plus, your project is hosted as a monorepo, and hosted as nodes where your frontend, backend, and database are stored in a single repo, and each node running your app components is isolated.
Opening your project’s cloud dev environment
Once your app is imported to Diploi, it is hosted as a single-node Kubernetes cluster with automatic SSL, hostnames, and CI/CD, which are all configured in a set of files generated by Diploi.
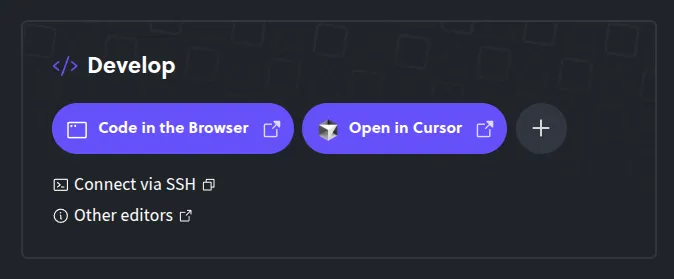
You can access your code and terminal to push the changes made to GitHub by either using the Browser IDE or opening your app with Cursor. In this guide, we’ll use Cursor, but feel free to use any IDE.
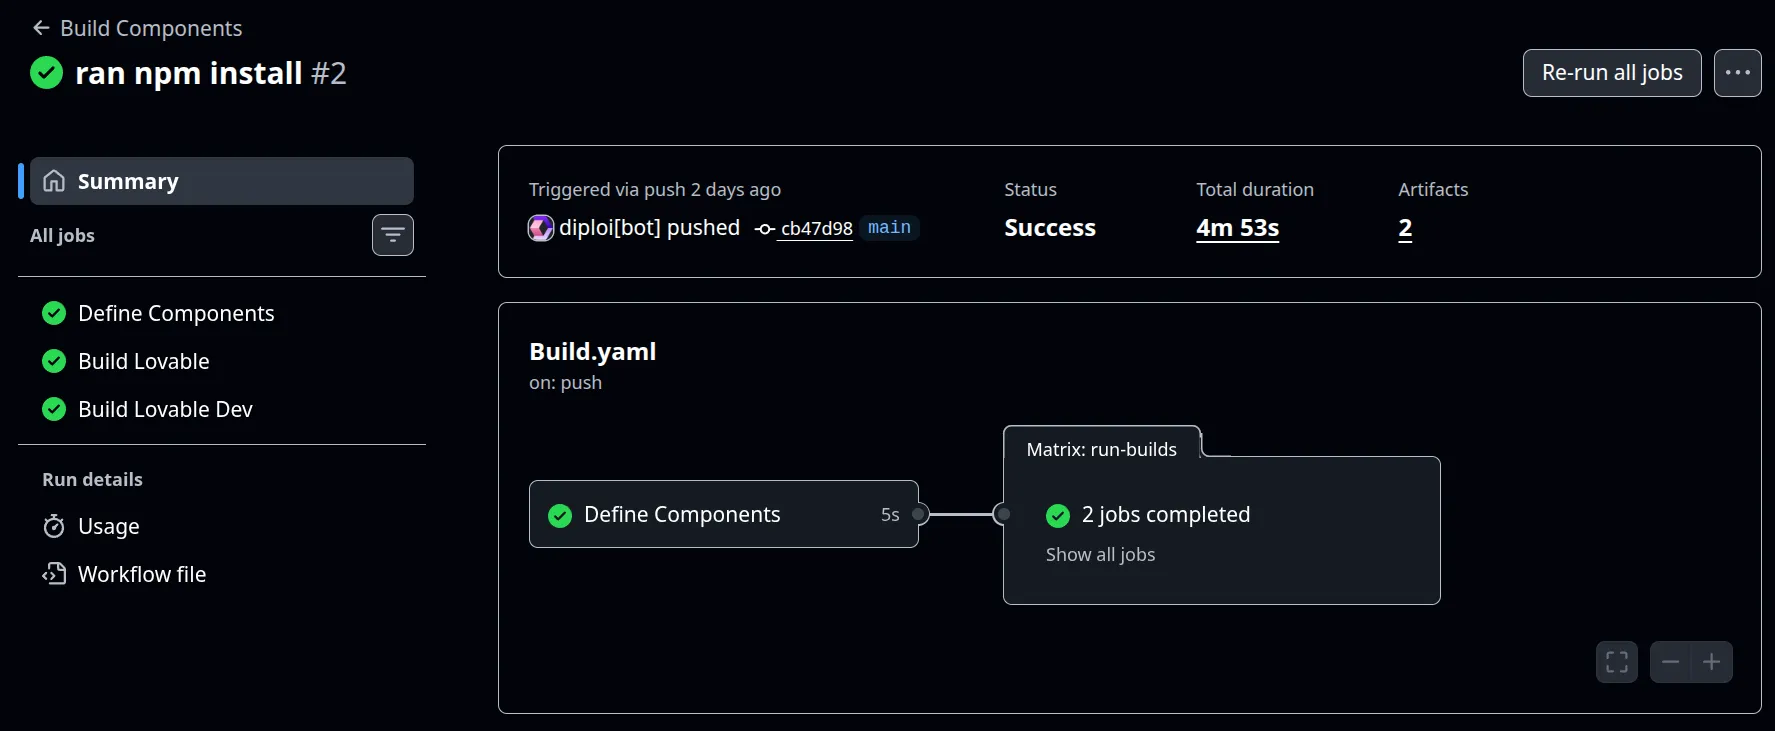
Once you access your cloud development environment, the next step is to push the changes made by Diploi to your repository.
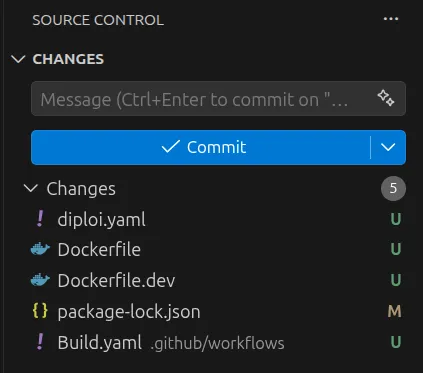
That will trigger the creation of a build using GitHub Actions, which creates one build for development and another for staging/production.
Adding Laravel and PostgreSQL
At this point, we have imported our CRM frontend from Lovable to Diploi and pushed any changes made by Diploi to our repository. Now we need to add Laravel and PostgreSQL.
In the root of your project, you’ll find the diploi.yaml file. This file gives you control over the composition of your app. By modifying the diploi.yaml file, you can add other frameworks, databases, and tools for your project. After importing from Lovable, your diploi.yaml will have the following:
diploiVersion: v1.0
components:
 - name: Lovable
    identifier: lovable
    folder: /
    package: https://github.com/diploi/component-lovable#v2
addons: []
All you need to do now is modify the content of the file to include Laravel and Postgres. To learn more about how to use this file, check https://docs.diploi.com/reference/diploi-yaml
diploiVersion: v1.0
components:
 - name: Lovable
    identifier: lovable
    folder: /
    package: https://github.com/diploi/component-lovable#v2
 - name: Laravel
    identifier: laravel
    package: https://github.com/diploi/component-laravel#v12
    env:
      include:
 - postgres.*
addons:
 - name: PostgreSQL
    identifier: postgres
    package: https://github.com/diploi/addon-postgres#v17.2
Once the edit is done, your deployment will have pending changes, which you must accept in order to get Laravel and Postgres running in the same deployment.
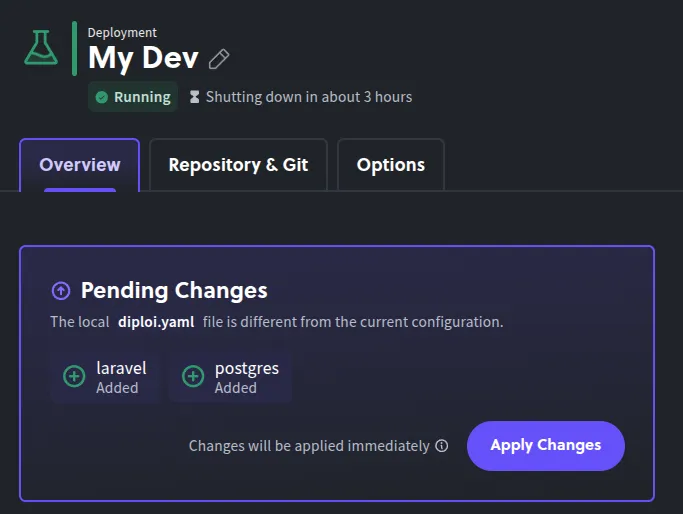
And now your project will have Laravel and Postgres running in your project, so next you need to push the changes to GitHub, in order to update the builds of your project.
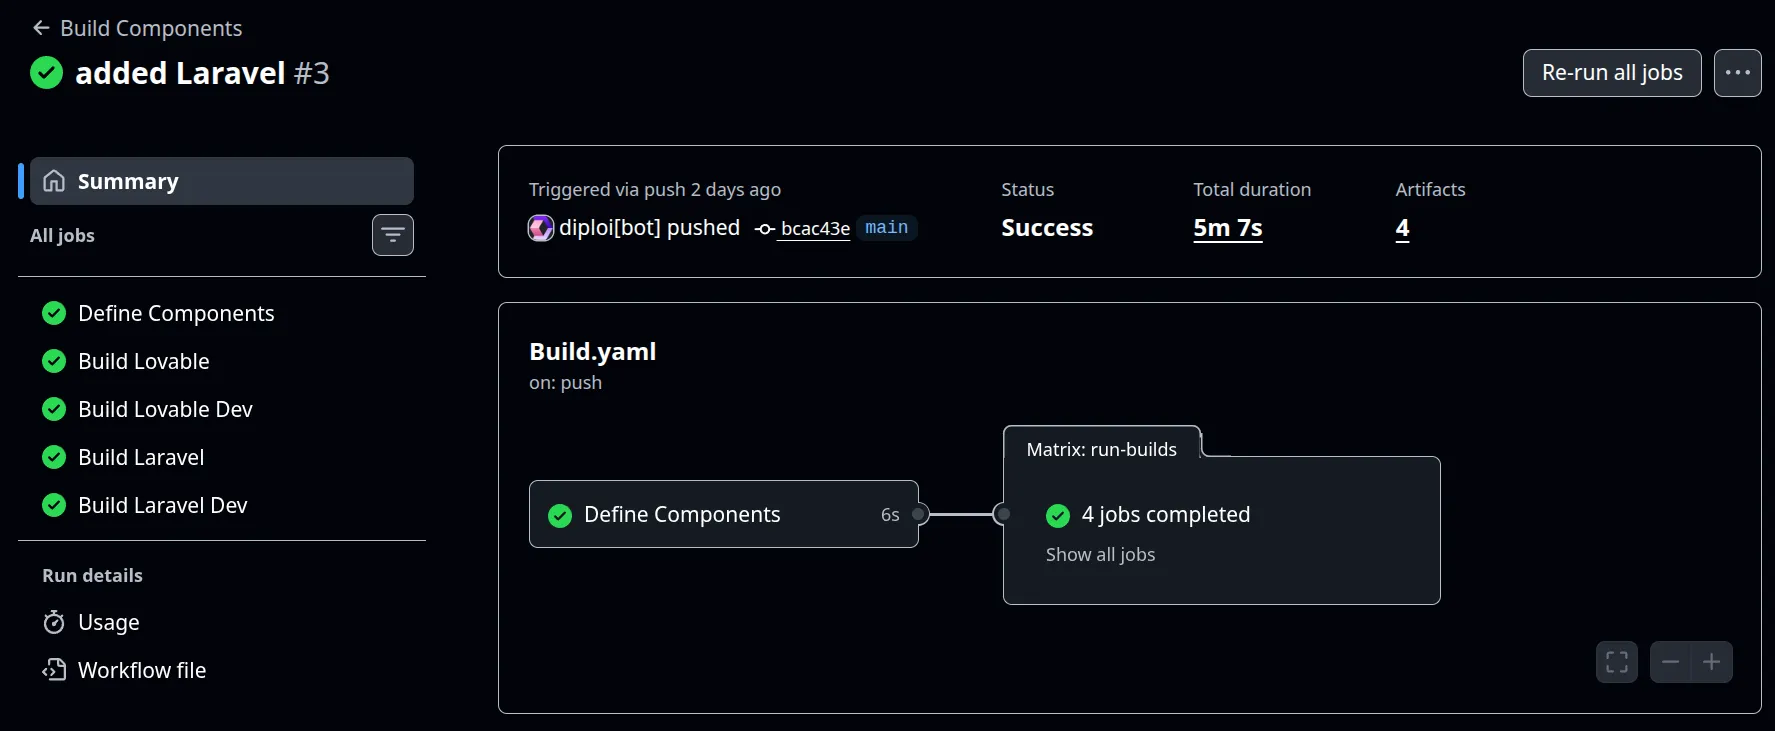
Now our deployment has two additional pods, which run Laravel and Postgres. So our setup can be illustrated as follows:
Step 3: Setting up context files for Cursor and general advice to prompt safely
Here’s where the migration from prototype to production begins. Before asking Cursor’s AI agent to do anything, we need to establish the context, which for Cursor, could be done in two ways:
- Creating an AGENTS.md file, which is a standard you can use with a wide variety of AI tools.
- Creating .cursor/rules/, which is the Cursor standard.
Both try to do the same, which is to tell the AI what to do, what to avoid, and when to ask for additional instructions or context. In this guide, we will opt for creating an AGENTS.md file because you can use it with pretty much any other tool out there. If you prefer using Cursor rules instead, check the best practices for it in this article https://cursor.com/docs/rules
AGENTS.md: one file to rule (almost all) AI agents/tools
AGENTS.md is an open standard with +20,000 open-source projects using it. All we need to do is create it in the root of your project, and Cursor will read it before planning changes.
In our case, we need to explain to the AI the overall logic for our app and the goals we want to achieve when we transition our CRM to use Laravel and Postgres. Let’s walk through the structure of the file:
- Project Overview: explains the monorepo split by defining that the root files are part of our Lovable prototype as a read-only reference, and that all real implementations belong in
/laravel. - Stack and Conventions: declares the exact backend, frontend, styling, routing, auth/permissions, queue, and package manager choices to prevent the AI from improvising.
- Directory Structure: provides a map of where controllers, models, policies, jobs, pages, components, types, hooks, and utilities must live.
- Database Schema: which lists the core tables by domain and tells the AI to keep naming aligned with schema definitions.
- Key Relationships: documents conversions and links between entities like lead to opportunity, quote to sales order, polymorphic activities, and board scope.
- Coding Rules: defines implementation constraints such as lightweight pages, reusable patterns, permissions checks, and shared UI conventions.
- Key Backend Actions: gives expected route patterns for high-impact operations like lead conversion, pipeline moves, and quotation send/accept flows.
- UX Principles: sets interaction goals such as activity-first design, personal plus team views, keyboard friendliness, and fast navigation.
# AGENTS.md — Diploi CRM Monorepo

## Project Overview

This is a monorepo for a CRM application built with **Laravel 11 + Inertia.js + React (TypeScript) + Tailwind CSS + PostgreSQL**, deployed via Diploi.

The repo contains two codebases:

| Path | Purpose | Modifiable? |
|------|---------|-------------|
| `/` (root) | Lovable-built React UI — **reference only** | ❌ Never modify |
| `/laravel` | Full-stack Laravel + Inertia.js app | ✅ All work goes here |

The Lovable UI (`src/`, `public/`, `index.html`, etc.) is a design reference. Extract component patterns, layouts, and styling from it, but **never edit it directly**. All production code lives under `/laravel`.

---

## Stack & Conventions

- **Backend:** Laravel 11 (PHP 8.2+), located in `/laravel`
- **Frontend:** React 18 + TypeScript, via Inertia.js (`/laravel/resources/js/`)
- **Styling:** Tailwind CSS (utility-first, no CSS modules)
- **Database:** PostgreSQL — connection URI: `postgres://postgres:postgres@postgres.postgres:5432/app`
- **ORM:** Eloquent (Laravel)
- **Routing:** Ziggy (`route()` helper in JS), Inertia `<Link>` components
- **Auth/Permissions:** Laravel Policies; frontend reads `auth.permissions` from Inertia shared data
- **Async jobs:** Laravel Queues (email, PDF generation); **no WebSockets yet**
- **Package manager:** Composer (PHP), npm/bun (JS)

---

## Directory Structure (under `/laravel`)

```
laravel/
├── app/
│   ├── Http/Controllers/      # Inertia controllers (thin, delegate to services)
│   ├── Models/                 # Eloquent models (match DB tables exactly)
│   ├── Policies/               # Authorization policies
│   ├── Services/               # Business logic (lead conversion, quote acceptance, etc.)
│   └── Jobs/                   # Queued jobs (SendQuotationEmail, GeneratePdf, etc.)
├── database/
│   ├── migrations/             # PostgreSQL migrations (source of truth for schema)
│   └── seeders/                # Dev seed data
├── resources/js/
│   ├── components/
│   │   ├── ui/                 # Button, Input, Select, Modal, Drawer, Badge, Tabs, Table, etc.
│   │   ├── layout/             # AppShell, Sidebar, Topbar, PageHeader, FiltersBar
│   │   ├── crm/                # KanbanBoard, KanbanColumn, KanbanCard, ActivityTimeline, etc.
│   │   └── forms/              # FormField, MoneyInput, PercentageInput, ProductSearchSelect, etc.
│   ├── pages/                  # Inertia pages (thin, composed of reusable components)
│   ├── types/                  # TypeScript interfaces matching backend DTOs
│   ├── hooks/                  # Shared React hooks (usePermissions, useFilters, etc.)
│   └── utils/                  # Helpers (can(), formatCurrency, etc.)
├── routes/
│   └── web.php                 # Inertia routes
└── config/
```

---

## Database Schema (Source of Truth)

Entity names **must** match the database. Never invent new entity names. If something is missing, add a `// TODO:` comment and a minimal placeholder type.

### Core Tables

| Domain | Tables |
|--------|--------|
| Users/Roles | `users`, `roles`, `role_user`, `teams`, `team_user` |
| Contacts | `contacts` (type: person/company, `parent_contact_id` for company relation) |
| Leads | `leads` (convertible to opportunities) |
| Pipeline | `opportunities`, `opportunity_stages` |
| Board Config | `pipeline_boards`, `pipeline_board_columns` |
| Products | `products` |
| Quotations | `quotations`, `quotation_lines` (line_type: item/section/note) |
| Sales Orders | `sales_orders`, `sales_order_lines` (line_type: item/section/note) |
| Activities | `activities` (polymorphic: `related_type` + `related_id`) |
| Tags | `tags`, `taggables` (polymorphic) |

### Key Relationships

- A **lead** converts to an **opportunity** (`leads.converted_opportunity_id`)
- An **opportunity** belongs to a **stage** and optionally a **contact**, **lead**, **team**
- A **quotation** links to a **contact** and optionally an **opportunity**
- Accepting a quotation creates a **sales order** (snapshot of quote lines)
- **Activities** are polymorphic: attached to leads, opportunities, quotations, sales orders, or contacts
- **Pipeline boards** can be personal (user) or team-scoped, with configurable column order and card fields

---

## Coding Rules

1. **Pages are thin.** Compose from reusable components; no giant single-file components.
2. **No duplicated UI logic.** If two pages share a pattern, abstract it.
3. **TypeScript types** under `resources/js/types/` must mirror backend DTOs.
4. **Permissions helper:** Use `can(permissionKey)` to conditionally show/hide UI actions.
5. **Data flow:** Inertia page props with typed DTOs. Use optimistic UI only where safe (e.g., stage move).
6. **Drawers** for entity quick view/edit (OpportunityDrawer, LeadDrawer, QuoteDrawer).
7. **List views** use DataTable + filters + saved views pattern.
8. **Entity detail pages** use 2-column layout: main content left, activity panel right.
9. **Kanban** supports drag-and-drop; keep implementation clean and replaceable.
10. **Currency** defaults to EUR; all money fields are `decimal(12,2)`.

---

## Key Backend Actions (Inertia Visits)

| Action | Route Pattern |
|--------|--------------|
| CRUD any entity | `POST/PUT/DELETE /entity` |
| Convert lead → opportunity | `POST /leads/{lead}/convert` |
| Move opportunity stage | `PUT /opportunities/{opportunity}/move` |
| Send quotation | `POST /quotations/{quotation}/send` |
| Accept quotation → create SO | `POST /quotations/{quotation}/accept` |
| Add activity (note/reminder) | `POST /activities` (polymorphic) |

---

## UX Principles

- **Fast, one-handed operation:** left nav + main canvas, minimal modals, keyboard shortcuts
- **One global search** across all entities
- **Activity-first:** same activity component everywhere
- **Personal + team views:** users create their own pipeline layouts within team pipelines
- **Modern CRM feel:** fast navigation, keyboard-friendly forms
Normally, we want to keep AGENTS.md as lean as possible. Since LLMs can follow about 150-200 instructions more reliably, the longer your file is, the more tokens will be consumed because this file gets loaded on every request.
Our goal is to do the least amount of prompting possible to get the end result we want, so we also have a plan for our prompts so that we can avoid shallow outputs for all of our features, which would be the issue if we try to one-shot our app conversion to Laravel.
Use Git flow: push changes to your code before every new prompt
Cursor’s agent (basically all other AI tools too) can delete and recreate files, silently revert changes, or lose sync during extended prompt sessions. So to limit the impact of any hallucinations from your AI of choice, follow this workflow:
git checkout -b feature/migrate-leads      # Create a feature branch for each new prompt

# [After you are satisfied with the result generated by your prompt, run the following commands]
git add .
git commit -m "<a description of what changes are being committed>"
git push --set-upstream origin feature/migrate-leads
Once your feature is pushed to GitHub, you can create a new pull request, where you can compare the changes you just submitted with the code on your main branch. If all works as expected, you can merge your changes with your main branch and repeat the workflow above for the next prompts you will perform.
Step 4: the migration workflow inside Cursor
With context files in place, we can start prompting. The key principle is: one feature per conversation, one commit per feature, as we said just before, don’t try to migrate everything at once.
Prompt sequence used to transform our app
We ran the following sequence of prompts to migrate our Lovable prototype to Laravel. We split each prompt into its own section to help you navigate it.
Remember to sync the changes made by each prompt to GitHub, so you can revert any broken updates made by the AI with ease.
Prompt 1: Scaffold the Laravel foundation
We start by establishing Laravel + Inertia + React + TypeScript + Tailwind as the baseline. This includes middleware shared props, PostgreSQL environment settings, a base authenticated layout, and a working “Hello CRM” placeholder route.
You are working inside the `/laravel` directory of a monorepo. The repo root contains a Lovable-built React CRM UI that serves as a read-only design reference. All production code goes in `/laravel`.

Your task: Set up the Laravel + Inertia.js + React (TypeScript) + Tailwind CSS foundation.

Steps:
1. Install and configure Inertia.js server-side (Laravel adapter) and client-side (React adapter) in `/laravel`.
2. Configure Vite for React + TypeScript + Tailwind CSS in `/laravel`.
3. Set up the Inertia middleware (`HandleInertiaRequests`) to share:
   - `auth.user` (authenticated user with roles)
   - `auth.permissions` (flat object of permission keys → boolean)
   - `flash` messages
   - `ziggy` routes
4. Configure the PostgreSQL database connection in `.env`:
   DB_CONNECTION=pgsql
   DB_HOST=postgres.postgres
   DB_PORT=5432
   DB_DATABASE=app
   DB_USERNAME=postgres
   DB_PASSWORD=postgres
5. Create a base Inertia layout (`resources/js/layouts/AuthenticatedLayout.tsx`) with placeholder slots for sidebar, topbar, and main content.
6. Create a basic `resources/js/app.tsx` entry point that boots Inertia with React.
7. Verify the setup compiles and serves a "Hello CRM" page at the root route.

Do NOT create any CRM-specific pages or components yet. Focus purely on the scaffolding.
Prompt 2: Create database migrations
Here we define the full CRM schema in PostgreSQL-first migration order so foreign keys resolve correctly. This prompt builds all core entities (users, roles, teams, leads, opportunities, quotations, orders, activities, tags) and verifies the stack with php artisan migrate.
You are working in `/laravel`. Refer to the database schema defined in `AGENTS.md`.

Your task: Create all database migrations for the CRM schema using PostgreSQL.

Create migrations in this order (respecting foreign key dependencies):

1. `users` — add fields: timezone (default 'Europe/Helsinki'), locale, is_active (boolean)
2. `roles` — name (Admin, Sales Manager, Sales Rep, Finance, Support)
3. `role_user` — pivot with composite unique (user_id, role_id)
4. `teams` — name, description (nullable), manager_user_id (nullable FK to users)
5. `team_user` — pivot with role_in_team (nullable), unique (team_id, user_id)
6. `contacts` — type enum (person/company), name, company_name, parent_contact_id (self-referencing FK), email, phone, website, vat_number, address fields, owner_user_id FK. Add indexes on owner_user_id, parent_contact_id, email.
7. `leads` — title, contact_name, company_name, email, phone, source, status enum (new/contacted/qualified/disqualified/converted), disqualify_reason, estimated_value decimal(12,2), owner_user_id FK, team_id FK, converted_opportunity_id (nullable FK to opportunities — add after opportunities migration)
8. `opportunity_stages` — team_id (nullable FK), name, sort_order, is_won (default false), is_lost (default false)
9. `opportunities` — name, contact_id FK, lead_id FK, team_id FK, owner_user_id FK, stage_id FK, amount decimal(12,2), currency_code char(3) default 'EUR', expected_close_date, probability tinyint, status enum (open/won/lost), won_at, lost_at, lost_reason, last_stage_changed_at. Indexes on (team_id, stage_id), owner_user_id, expected_close_date.
10. `pipeline_boards` — name, scope enum (personal/team), team_id (nullable FK), user_id (nullable FK), default_filters json, card_fields json, sort json
11. `pipeline_board_columns` — pipeline_board_id FK, stage_id FK, sort_order, is_visible (default true). Unique (pipeline_board_id, stage_id).
12. `products` — sku (unique, nullable), name, description, sales_price decimal(12,2) default 0, cost_price decimal(12,2) nullable, currency_code char(3) default 'EUR', unit varchar(50) default 'pcs', is_active (default true)
13. `quotations` — quote_number (unique), status enum (draft/sent/accepted/rejected/expired), contact_id FK, opportunity_id FK (nullable), owner_user_id FK, team_id FK, currency_code, valid_until, notes_internal, notes_customer, subtotal, tax_total, total, sent_at, accepted_at
14. `quotation_lines` — quotation_id FK, line_type enum (item/section/note), sort_order, product_id FK (nullable), description, quantity decimal(12,3), unit, unit_price decimal(12,2), discount_percent decimal(5,2), tax_percent decimal(5,2), line_total decimal(12,2)
15. `sales_orders` — order_number (unique), status enum (draft/confirmed/fulfilled/invoiced/cancelled), contact_id FK, quotation_id FK (nullable), opportunity_id FK (nullable), owner_user_id FK, team_id FK, currency_code, subtotal, tax_total, total, confirmed_at
16. `sales_order_lines` — (same structure as quotation_lines, with sales_order_id FK)
17. `activities` — activity_type enum (note/task/call/email/meeting), subject, body, due_at (nullable), completed_at (nullable), status enum (open/done), assigned_user_id FK, created_by_user_id FK, related_type varchar(50), related_id bigint. Indexes on (related_type, related_id), (assigned_user_id, due_at), status.
18. `tags` — name (unique), color (nullable)
19. `taggables` — tag_id, taggable_type, taggable_id. Index on (taggable_type, taggable_id).
20. Add `converted_opportunity_id` FK to leads table (separate migration).

After writing all migrations, run `php artisan migrate` to verify they execute cleanly.
Prompt 3: Add models and relationships
Once the schema exists, we create models with proper $fillable or $guarded, $casts, relationship methods, and useful query scopes.
You are working in `/laravel`. The database migrations from the previous step are in place.

Your task: Create all Eloquent models with proper relationships, casts, and scopes.

For each model, define:
- `$fillable` or `$guarded` attributes
- `$casts` (especially for enums, decimals, dates, json fields)
- All relationships (`belongsTo`, `hasMany`, `belongsToMany`, `morphMany`, `morphTo`, `morphToMany`)
- Useful scopes where obvious (e.g., `Lead::scopeActive`, `Opportunity::scopeOpen`, `Activity::scopeOverdue`, `Activity::scopeDueToday`)

Models to create:
1. User — roles (belongsToMany), teams (belongsToMany), ownedContacts, ownedLeads, ownedOpportunities, assignedActivities, createdActivities, personalBoards
2. Role — users (belongsToMany)
3. Team — users (belongsToMany), manager (belongsTo User), leads, opportunities, quotations, salesOrders, stages, boards
4. Contact — parent (belongsTo self), children (hasMany self), leads, opportunities, quotations, salesOrders, activities (morphMany), tags (morphToMany), owner (belongsTo User)
5. Lead — contact relationship (optional), owner, team, convertedOpportunity, activities (morphMany), tags (morphToMany)
6. OpportunityStage — team, opportunities, boardColumns
7. Opportunity — contact, lead, team, owner, stage, quotations, salesOrders, activities (morphMany), tags (morphToMany)
8. PipelineBoard — team, user, columns (hasMany)
9. PipelineBoardColumn — board (belongsTo), stage (belongsTo)
10. Product — quotationLines, salesOrderLines
11. Quotation — contact, opportunity, owner, team, lines (hasMany), salesOrders, activities (morphMany)
12. QuotationLine — quotation, product
13. SalesOrder — contact, quotation, opportunity, owner, team, lines (hasMany), activities (morphMany)
14. SalesOrderLine — salesOrder, product
15. Activity — assignedUser, createdByUser, related (morphTo), polymorphic on related_type/related_id
16. Tag — taggables (morphedByMany for Contact, Lead, Opportunity)

Use `AGENTS.md` as the naming reference. If any table or relationship is ambiguous, add a `// TODO:` comment.
Prompt 4: Build shared TypeScript types and utilities
Now we generate the frontend entity interfaces, Inertia page prop types, and shared helpers for permissions, formatting, and URL-synced filters.
You are working in `/laravel/resources/js/`.

Your task: Create TypeScript type definitions and shared utilities.

1. Create `types/` directory with interfaces for all entities matching the backend DTOs:
   - `types/index.ts` — export all types
   - Types: User, Team, Role, Contact, Lead, Opportunity, OpportunityStage, Quotation, QuotationLine, SalesOrder, SalesOrderLine, Product, Activity, PipelineBoard, PipelineBoardColumn, Tag
   - Types for Inertia shared data: `PageProps` (extends InertiaPageProps with auth, flash, ziggy)
   - Types for filter/pagination: `PaginatedResponse<T>`, `Filters`, `SavedView`

2. Create `utils/permissions.ts`:
   - `can(permission: string): boolean` — reads from Inertia shared `auth.permissions`
   - Wrap it in a `usePermissions()` hook that returns `{ can }`

3. Create `utils/format.ts`:
   - `formatCurrency(amount: number, currency?: string): string`
   - `formatDate(date: string): string`
   - `formatRelativeDate(date: string): string`

4. Create `hooks/useFilters.ts`:
   - Hook for managing filter state with Inertia router (debounced search, URL-synced filters)

Keep types minimal but accurate. Use `// TODO:` for fields you're unsure about.
Prompt 5: Build base UI primitives
This creates the reusable UI library (Button, Input, Select, Modal, Drawer, DataTable, and more) using Tailwind-only implementations, which will be the standard building blocks for the app pages.
You are working in `/laravel/resources/js/components/`.

Your task: Create the base UI component library. Reference the Lovable UI at the repo root (`/src/`) for design patterns and styling, but create new, clean implementations.

Create under `components/ui/`:
1. `Button.tsx` — variants: primary, secondary, ghost, danger. Sizes: sm, md, lg. Loading state.
2. `Input.tsx` — text input with label, error state, help text.
3. `Select.tsx` — dropdown select with label and error state.
4. `Modal.tsx` — centered overlay modal with title, body, footer slots.
5. `Drawer.tsx` — right-side sliding panel (for entity quick view/edit).
6. `Badge.tsx` — status badges with color variants (e.g., for lead status, quote status).
7. `Tabs.tsx` — tab component with active state.
8. `DataTable.tsx` — sortable, paginated table that works with Inertia pagination.
9. `Dropdown.tsx` — action dropdown menu.
10. `Tooltip.tsx` — simple hover tooltip.
11. `Avatar.tsx` — user avatar with fallback initials.
12. `DatePicker.tsx` — date input (can use a simple native input for now, with TODO for upgrade).

All components should:
- Be fully typed with TypeScript props interfaces
- Use Tailwind CSS exclusively (no inline styles, no CSS modules)
- Be composable and accept `className` prop for extension
- Follow modern CRM aesthetic (clean, minimal, professional)
Prompt 6: Implement app layout components
With this prompt, we add components that will be used across the entire app, like Sidebar, Topbar, PageHeader, and FiltersBar, and then we will wire them into the authenticated layout.
You are working in `/laravel/resources/js/components/layout/`.

Reference the Lovable UI's app shell design for the layout patterns.

Create:
1. `AppShell.tsx` — main layout wrapper with sidebar + topbar + content area.
2. `Sidebar.tsx` — collapsible left nav with links: Dashboard, Leads, Pipeline, Contacts, Products, Quotations, Sales Orders, Activities, Settings. Icons for each. Collapsed state shows icons only with tooltips. Persist collapse state.
3. `Topbar.tsx` — sticky top bar with:
   - Left: hamburger toggle for sidebar, logo/app name
   - Center: global search input (placeholder, wired later)
   - Right: "+ Create" dropdown (Lead, Opportunity, Contact, Quotation, Product, Activity), notification bell placeholder, user avatar menu (profile, sign out)
4. `PageHeader.tsx` — reusable page header with title, subtitle, context switchers slot, primary action button slot.
5. `FiltersBar.tsx` — horizontal bar of filter chips/dropdowns, reusable across list views.

Wire up `AppShell` as the authenticated layout in the Inertia app. All pages should render inside it.
Prompt 7: Create CRM-specific components
At this point, we will start building CRM components like Kanban board, activity timeline, and reusable entity summary blocks.
You are working in `/laravel/resources/js/components/crm/`.

Create domain-specific CRM components:

1. `KanbanBoard.tsx` — horizontal scrolling board of columns. Accepts columns and cards as props. Supports drag-and-drop (use @dnd-kit/core or a simple implementation). Fires `onCardMove(cardId, fromColumn, toColumn)` callback.
2. `KanbanColumn.tsx` — single column with stage name, count, amount sum, and a list of cards.
3. `KanbanCard.tsx` — compact card showing: opportunity name, company/contact, amount + currency, expected close date pill, owner avatar, next activity indicator (red if overdue), up to 2 tags. Click fires `onCardClick`.
4. `ActivityTimeline.tsx` — vertical timeline of activities (notes, tasks, calls, emails, meetings). Shows overdue reminders at top (red), then upcoming, then notes, then system events. Each item shows type icon, subject, body preview, timestamp, assigned user.
5. `ActivityComposer.tsx` — quick add form for notes and reminders. Type selector (note/task/call/email/meeting), subject, body, due date, assigned user.
6. `EntityHeader.tsx` — reusable entity page header with: entity name, status badge, owner, team, quick action buttons.
7. `EntitySummaryCards.tsx` — summary stat cards (e.g., total value, open opportunities, quotes sent).

Keep drag-and-drop implementation clean and replaceable. Use callbacks, not direct Inertia calls inside components.
Prompt 8: Add specialized form components
Next, we need to form components that can handle money and percentage inputs, along with async product/contact search selects. The goal of this prompt is to standardize form behavior and stay compatible with Inertia useForm().
You are working in `/laravel/resources/js/components/forms/`.

Create specialized form components:

1. `FormField.tsx` — wrapper that provides label, error display, and help text for any form input.
2. `MoneyInput.tsx` — numeric input with currency symbol, formats to 2 decimal places, handles locale.
3. `PercentageInput.tsx` — numeric input constrained 0-100 with % suffix.
4. `ProductSearchSelect.tsx` — async typeahead search that queries `/products/search` endpoint. Shows product name, SKU, price. Fires `onSelect(product)`.
5. `ContactSearchSelect.tsx` — async typeahead search that queries `/contacts/search` endpoint. Shows contact name, company, type badge. Fires `onSelect(contact)`.

All form components should work with Inertia's `useForm()` hook. Accept `value`, `onChange`, and `error` props.
Prompt 9: Backend controllers and routes for leads, contacts, and products
So far, we have been working mainly on the frontend, and now we will start creating controllers, resource routes, and policies for our CRM’s logic. This step also introduces filtering patterns, lead conversion flow, and product API endpoints.
You are working in `/laravel`.

Create Inertia controllers, routes, and policies for Leads, Contacts, and Products.

For each entity, create:
- A controller (e.g., `LeadController`) with `index`, `show`, `create`, `store`, `update`, `destroy` methods
- A Policy (e.g., `LeadPolicy`) with `viewAny`, `view`, `create`, `update`, `delete` methods (stub logic based on roles)
- Routes in `routes/web.php` using `Route::resource()` with Inertia

Specific requirements:
1. **LeadController**:
   - `index` — paginated list with filters (status, source, owner, team, date range, tags), support saved views
   - `show` — lead detail with related activities, tabs data
   - `convert` — `POST /leads/{lead}/convert` — creates an Opportunity from the lead, optionally creates/links Contact, marks lead as converted

2. **ContactController**:
   - `index` — paginated list with filters (type, owner, tags)
   - `show` — contact detail with related opportunities, quotations, orders, activities

3. **ProductController**:
   - `index` — paginated list with filters (active, category)
   - `show` — product detail
   - `search` — `GET /products/search?q=` — returns JSON for typeahead (used by ProductSearchSelect)

Pass data to Inertia pages using typed props. Include `auth.permissions` in shared data for frontend permission checks.
Prompt 10: Backend controllers and routes for pipeline, quotations, sales, orders, and activities
Here we expand our backend functionality to include pipeline movements, board customizations, quotation lifecycle actions, sales order flows, activity management, and global search. This is where most workflow endpoints will be finalized.
You are working in `/laravel`.

Create controllers, routes, and policies for Pipeline, Quotations, Sales Orders, and Activities.

1. **OpportunityController**:
   - `index` — supports both Kanban and List view (toggle via query param). Returns stages + opportunities grouped by stage for Kanban mode.
   - `store`, `update`, `destroy`
   - `move` — `PUT /opportunities/{opportunity}/move` — updates stage_id and last_stage_changed_at. Use optimistic UI pattern (return minimal response).

2. **PipelineBoardController**:
   - `index` — list boards for current user (personal + team)
   - `store`, `update`, `destroy` — manage board configurations

3. **QuotationController**:
   - `index` — paginated list with filters
   - `show` — quotation detail with lines (supports item/section/note row types)
   - `store`, `update` — full quotation builder (create/update with lines in single request)
   - `send` — `POST /quotations/{quotation}/send` — marks as sent, queues email job
   - `accept` — `POST /quotations/{quotation}/accept` — marks as accepted, creates SalesOrder with snapshot of lines

4. **SalesOrderController**:
   - `index`, `show`, `update`

5. **ActivityController**:
   - `index` — "My Activities" with segments: overdue, due today, upcoming
   - `store` — create activity (polymorphic: pass `related_type` and `related_id`)
   - `update` — mark complete, reschedule
   - Supports note, task, call, email, meeting types

6. **SearchController**:
   - `GET /search?q=` — global search across contacts, leads, opportunities, quotes, orders, products. Return results grouped by entity type.
Prompt 11: Frontend for leads, contacts, and products pages
Now we will use the shared components created before, to build typed Inertia pages for the first customer-facing modules. The focus is to generate the list/detail experiences, ensure navigation consistency, and create conversion-ready lead views.
You are working in `/laravel/resources/js/pages/`.

Create Inertia pages for Leads, Contacts, and Products. Compose from the reusable components created earlier. Pages should be thin — logic lives in components and hooks.

1. **Leads/Index.tsx** — DataTable with filters (status, source, owner, team), saved views dropdown, "+ Lead" button, row actions (Qualify, Convert, Disqualify, Assign).
2. **Leads/Show.tsx** — 2-column: left main (header + tabs: Overview, Related) + right ActivityTimeline + ActivityComposer. "Convert to Opportunity" opens a Drawer with form fields.
3. **Contacts/Index.tsx** — DataTable with filters (type, owner, tags), row click navigates to detail.
4. **Contacts/Show.tsx** — 2-column: left main (tabs: Overview, Opportunities, Quotations, Orders) + right ActivityTimeline.
5. **Products/Index.tsx** — DataTable with filters (active, name search), "+ Product" button.
6. **Products/Show.tsx** — simple detail page with product info.

Each page receives typed Inertia props. Use `useForm()` for forms, `router.visit()` for navigation, `route()` for URL generation.
Prompt 12: Frontend for pipeline, quotes, orders, and activities
This prompt will now complete the rest of the frontend layers you would expect to see on a CRM, which include Kanban pipeline interactions, quotation builder UX, sales order detail flows, activity segmentation, and a dashboard placeholder.
You are working in `/laravel/resources/js/pages/`.

Create remaining pages:

1. **Pipeline/Index.tsx** — Kanban view using KanbanBoard. Header: team selector, view selector (Kanban/List), saved views, filters (owner, team, stage, close date, tags, value range), "+ Opportunity" and "Customize view" buttons. Card click opens OpportunityDrawer. Drag-and-drop calls `move` endpoint.
2. **Pipeline/Show.tsx** — Opportunity detail (2-column with ActivityTimeline).
3. **Quotations/Index.tsx** — DataTable with filters (status, customer, date range), "+ Quotation" button.
4. **Quotations/Show.tsx** — Quotation builder page. Top header (quote number, status, customer search, linked opportunity, valid until, currency). Left 70%: line items grid (drag-to-reorder, product search, editable fields, section/note row types, "Add line" button, keyboard-friendly). Right 30%: totals card + activity panel. Actions: Save, Send, Mark Accepted, PDF Preview placeholder.
5. **SalesOrders/Index.tsx** — DataTable with filters.
6. **SalesOrders/Show.tsx** — Similar to quotation detail but fewer editable controls.
7. **Activities/Index.tsx** — "My Activities" list segmented: Overdue (red), Due Today, Upcoming. Each item shows type icon, subject, linked entity, due date, actions (complete, reschedule).
8. **Dashboard/Index.tsx** — Placeholder dashboard with summary cards.

Ensure all pages compile, use correct imports, and follow consistent styling.
Prompt 13: Authorization and role enforcement
A very important task now is to define role permissions and the types of users our CRM will have. This prompt aims to propagate auth.permissions via Inertia shared data, apply policy checks across backend actions, and add frontend controls using can().
You are working in `/laravel`.

Implement the authorization layer:

1. Define role-based permissions as constants/config:
   - **Admin**: full access to everything
   - **Sales Manager**: manage team pipelines/boards, reassign owners, view all team records
   - **Sales Rep**: CRUD own leads/opportunities/quotes/orders within permitted scope, personal views
   - **Finance (Read-only)**: read access to contacts, quotes, orders; can export; can mark orders invoiced
   - **Support**: view customers and notes, add activities, cannot change pipeline financial fields

2. Update `HandleInertiaRequests` middleware to compute and share `auth.permissions` as a flat `Record<string, boolean>` object. Include permissions like: `leads.create`, `leads.edit`, `leads.delete`, `leads.assign`, `opportunities.create`, `pipeline.customize_team`, `quotations.send`, `quotations.accept`, `products.view_cost`, etc.

3. Update all Policies to implement actual authorization checks based on roles and team membership.

4. Ensure frontend `can()` helper correctly reads from shared permissions. Add permission checks to all relevant UI elements (show/hide buttons, disable fields).

5. Seed a `DatabaseSeeder` with sample roles, a few users with different roles, a team, and sample data for development.
Prompt 14: Final integration pass
Finally, we run our last prompt to connect queue jobs, enabling topbar global search, creating shortcuts, settings stub and error pages, which then is reviewed to validate typing, permissions, loading states, and list any missing details in a todo list.
You are working in `/laravel`.

Final integration pass:

1. **Queued Jobs**:
   - `SendQuotationEmail` — triggered when quotation is marked as "sent"
   - `GenerateQuotationPdf` — placeholder job for PDF generation
   Configure the queue connection for database driver.

2. **Global Search**: Wire up the SearchController to the Topbar's global search input. Results grouped by entity type with keyboard navigation.

3. **"+ Create" Dropdown**: Wire up the Topbar create button to open the appropriate create form/drawer for each entity type.

4. **Settings Page** (stub): Create a basic Settings page accessible by Admin role, with placeholder sections for Teams, Stages, Roles.

5. **Error Handling**: Add Inertia error pages (403, 404, 500).

6. **Review all pages** for:
   - Correct TypeScript types (no `any`)
   - Consistent component usage
   - Permission checks on all CRUD actions
   - Proper loading states
   - Flash message display

7. Provide a summary of:
   - New component structure
   - Key reusable components created
   - TODOs for any missing backend endpoints or policies
And now we are ready! But of course, we still need to manually verify the end result since no AI is safe from hallucinations.
Step 5: Debugging the final app
By now, we have created a prototype in Lovable, which helped us establish the look and feel for our CRM app. After that, we used Cursor and Diploi to convert it into a Laravel app with Postgres using a set of prompts and the AGENTS.md context file to tell Cursor how to drive the creation of our fullstack app.
At this point we (and hopefully you too if you followed this guide 🤗) have a CRM app, fully operational.
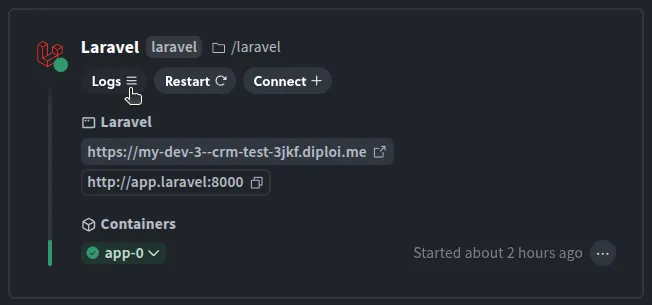
Now our job is to verify that all works as expected. You can do this manually or by creating end-to-end tests with the help of Cursor. The key is to learn how to read console outputs of your application, since this is where you will be able to determine what are the issues in your application.
If you are using Diploi, you can view the server output for your Laravel application by clicking on the “logs” of the Laravel container, from the overview tab in the deployment dashboard of your project.
The economics of building over subscribing
Alright, we have gone this far, used thousands of tokens, but we didn’t ask first if it is worth it at all. The truth is that… it depends 😬
Traditional CRM costs for a 10-person sales team
Typically, CRM tools are expensive, but you get in return a tool that (hopefully) is reliable and where your data (sometimes) is safe.
For example, Salesforce Pro Suite runs $100/user/month, that’s $12,000/year before implementation costs ($5K-$500K), admin staff, and AppExchange add-ons. A realistic Salesforce Enterprise deployment for 50 users costs $285,000-$330,000+/year all-in. Even Salesforce Starter at $25/user/month adds up to $3,000/year for 10 users - and you hit feature walls quickly.
HubSpot Sales Professional costs $100/seat/month plus a mandatory $1,500 onboarding fee. A 10-person team pays $13,500 in year one, $12,000/year ongoing.
Pipedrive Growth seems cheaper at $39/seat/month ($4,680/year for 10 users), but add-ons like LeadBooster ($32.50/mo), Campaigns ($16/mo), and Web Visitors ($49-$299/mo) inflate the real cost well past $7,000/year.
At face value, the CRM tools are expensive, but only if the solution you are paying for has more features than what your business actually needs. If that’s your case, then you might be better served by building something that fits your business needs exactly.
Building and maintaining a vibe-coded alternative
Let’s talk about the economics of a vibe-coded solution. You would be expected to pay for the following tools first:
| Item | Monthly cost |
|---|---|
| Lovable Pro (CRM frontend generation) | €25 |
| Cursor Pro (AI-powered migration/development) | €20 |
| Diploi production hosting (S cluster + 10GB storage) | |
| Total | ~€68/month (€816/year) |
That’s a flat cost regardless of user count. Adding your 11th sales rep costs you nothing. At 10 users, you’re paying roughly $7/user/month vs. $25-$175/user/month on traditional platforms.
Sounds like a no-brainer, right?
When this approach does and doesn’t make sense
The reality is that raw cost of the tools, are not really the only costs you need to consider when creating a vibe coded tool, because you will need someone to maintain/develop the tool and that could easily cost you at the very least +€45,000/year in additional personnel costs.
That said, before you scream, consider that this tool will be only used by your team, so chances are that the person you hire to maintain/develop your own custom CRM tool, will not need to worry about scaling the service to serve a million users, which reduces your custom tool complexity by a massive margin.
In fact, you could have your own in-house developer creating tailor-made SaaS tools that only your business will be using, so you might be able to replace a broad range of tools that your business uses with only one person.
We believe that you should consider building custom tools only when you have fewer than 50 users, or if your workflow doesn’t match off-the-shelf software solutions. The larger your organization is, the harder it becomes to justify building custom tools since these will add overhead costs to your company.
You should stick with SaaS solutions when you need compliance certifications (HIPAA, SOC2), your team has 100+ users who require systems with deep integrations with phone systems and marketing automation that have been battle-tested, or nobody on your team can maintain the application.
There have been a plethora of security vulnerabilities found on apps built with vibe coding tools. So trusting anything vibecoded for mission-critical tools should only be done if you have the developer know-how in your organization to ensure reliability in any custom tool created.
Our suggestion is that whenever you consider switching to a custom vibecoded tool, do it in stages, by first validating with a prototype, and if the prototype meets the expectations of your team, proceed to build a production version. Only switch your operations after you have ensured that your custom solution is stable enough for your business.
Conclusion: replacing any SaaS tools is possible, but be cautious
The CRM we built in this article, would have cost a team months of traditional development time or thousands per month in SaaS subscriptions. With the Lovable, Diploi, and Cursor, we created a working version in a day.
The gap between “AI prototype” and “production application” has gotten blurry. A production-ready version could be created within weeks, not months while keeping monthly costs under €70/month.
But do not fall for the trap of assuming that EVERY tool should be replaced, because unless you have the personnel necessary to maintain it, you could end up spending way more in unexpected costs due to brittle solutions that vibecoded, which could slow your company down or worst 💀
At this point, we recommend you experiment with vibecoding and see what else is possible.
Let us know what you build! You can connect with us via email or join our Discord by visiting https://discord.com/invite/vvgQxVjC8G
References
- Official AGENTS.md standard https://agents.md/
- How to use the diploi.yaml file https://docs.diploi.com/reference/diploi-yaml
- Custom Domains on Diploi https://docs.diploi.com/deploying/custom-domain/
- How apps are hosted on Diploi https://docs.diploi.com/reference/deployments/deployment-lifecycle
- Using components on Diploi https://docs.diploi.com/building/components
- using add-ons on Diploi https://docs.diploi.com/building/add-ons
- This article is based on a workflow and project created by https://github.com/LeGittan